Showing posts with label 2017. Show all posts

Saturday, June 3, 2017

Peanut Head

By Elissa Rosenthal

Hello, Everyone! This week is the start of hopefully a bit of a busy future for me so, I did something a little simple for this week's post. I will still be doing projects that take longer to make, however, depending on how detailed they are, they may take a few weeks to complete and show you guys. So look forward to more detailed projects in the future, once in a while, and little characters and other creations in the meantime. 

I love you all and thank you for staying with my blog!

For this week, we have a character I will like to call Peanut Head. This character I did with a very quick exercise where you need to come up with a character sketch in thirty minutes or less. 


 I imagine he is a very enthusiastic character with confidence that everyone envies, even a little bit. Peanut Head puts on odd and brightly colored clothing, makes over dramatic expressions of affection, and wears huge sunglasses to stand out the way he wants to, to draw fellow beings away from his head. The reason he is so self-conscious has nothing to do with his lack of hair, but the shape of his head. When he was younger, it was the main subject for unoriginal bullies of his to tease him. This is why now, whenever his head shape is brought up, he makes it a joke for everyone so others cannot make a joke about it first.


Peanut Head

By Elissa Rosenthal 


My head you understand, so shapely mine,


Came into contact with a ball of twine.


Brown, scratchy, string wrapped around my large head,


The small prickly began to embed.


"Why? Please no!", I cried, "Why do you embed?"


"Because,...", said The Twine, "I want your large head.


I want it to be a peanut instead."


It hurt quite a bit, with a short, slight tug,


Now I look cuter than a little pug.


Thank you for reading my blog! If you wish to follow me you can:


👉FOLLOW ME ON TWITTER @TheElissaPost: HERE

👉LIKE MY FACEBOOK FAN PAGE: HERE

👉FOLLOW ME ON INSTAGRAM: HERE

👉GET EMAIL NOTIFICATIONS BY PUTTING YOUR EMAIL INTO THE FOLLOW BY EMAIL FEATURE.  

Saturday, May 20, 2017

Ultramarine: A Poem Inspired By Watercolor Landscape

By Elissa Rosenthal

Hello Everyone! This week I started to delve deeper into watercolor, having now bought proper watercolor paper. The difference I have found is great in the lack of the paper buckling and creating pools where the color wanted to go. Now the surface is much more even when I paint, making it easier to distribute the color.

Anyway, since the character and poem was so popular last week, in comparison to my other kinds of posts on average, I have decided to provide you with another poem. This one is inspired by the landscape painting I did below. I was practicing on painting with no prior planning, just letting the paint tell me what to do with it. 


Ultramarine 
By Elissa Rosenthal

Crisp oxygen filtered through new pollen.

Thundering movement kisses the mountain.


Storming pools welcome you to sit and wait,

To be pulled from safety to waterfall.

They may call you to seal your own fate,

I beg of you to not answer the call.


I have seen too many who follow death.

Think they own this place and are not a guest.


The pools may look safe to those who not know,

How ultramarine whispers pull you in.

Current may seem stagnant and slow,


They will prove to you how lazy you swim. 


Feel free to leave a comment in the comment section below! Let us have a conversation!


👉FOLLOW ME ON TWITTER @TheElissaPost: HERE

👉LIKE MY FACEBOOK FAN PAGE: HERE

👉FOLLOW ME ON INSTAGRAM: HERE

👉FOLLOW BY EMAIL BY PUTTING YOUR EMAIL INTO THE FOLLOW BY EMAIL 


Saturday, May 13, 2017

Mire The Zucchini


By Elissa Rosenthal

Hello, Everyone! I hope you all are having a good day. For a little while now I have been thinking about doing characters with background stories, and possibly a few comics on here. Please let me know in the comments if you have any thoughts about this idea.

The reason for this idea is because I realized, when I was doing the post last week, I quite enjoyed writing about the character I created. I found it exciting and fun to show you guys, gals, and everything in-between, my voice for story telling. Most of what I have shown on here has been my informative writing, not so much story telling, so, I am thinking of diving a bit deeper into that way of writing.

Now, do not fret if you like the tips and tricks I give sometimes, those I am sure will still be there. Along with telling you short background stories of my characters, and who knows, if  I or others like them enough, I may make full stories or poems.

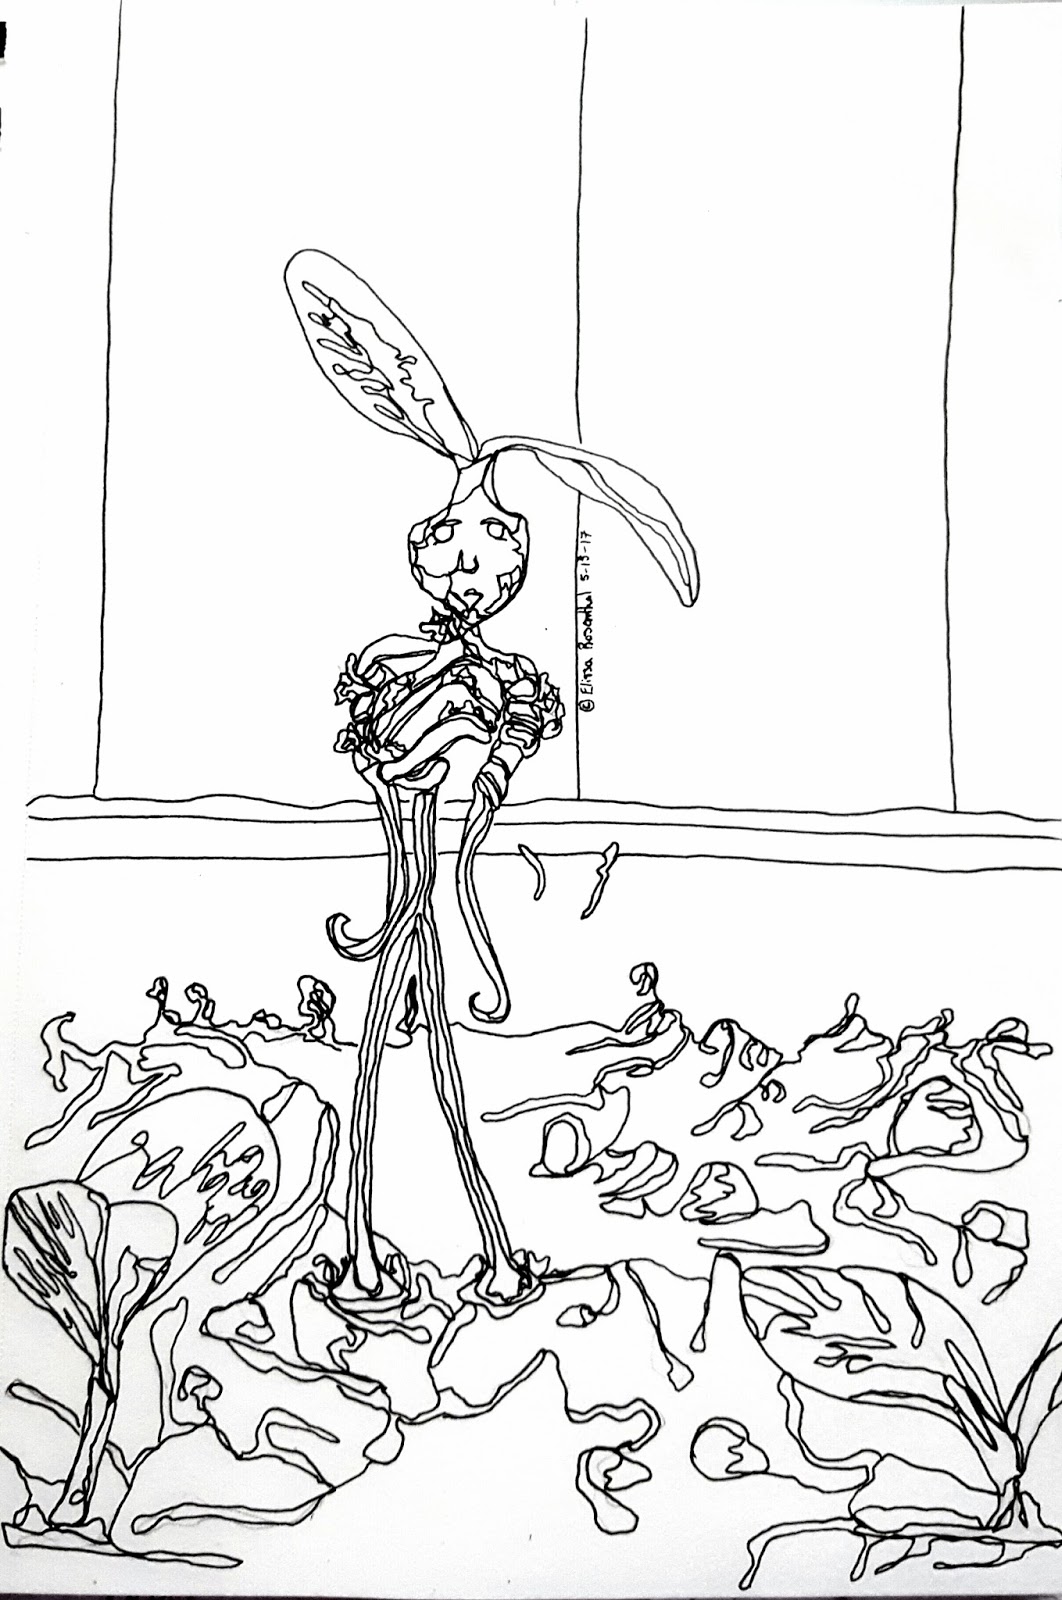
To start off, let me introduce you to this little guy, I found in my minds' eye while looking at some plants on my window sill. I decided to draw him in a style in-between modified contour and continuous contour after doing some sketching of him. The ground I decided to not do in full detail because I thought it would become a bit messy, particularly since I have not practiced contour drawing recently.


This little guys' name is Mire. His body is made from roots that spindle and curl around each other, and taper off at the ends. Upon his head is the same type of baby plant around him, since he originated from one of the seeds. He is a caregiver for these zucchini, making sure they look and feel dry when they need water, and helping to guide their leaves to the light source.

Mire will have a longer life than some of his relatives, for example those who take care of carrots, if the humans who feed off his plants take good care of them. For his kind only last until the last plant under their care is consumed or ripped up. But do not fret, more of his kind will come, as long as the cycle of life and death provides.

Nothing in this world is permanent, as his kind know. They live everyday understanding that their roots can be ripped up and their leaves shredded at any given time. They bathe in the sun, soaking up its energy and warmth, happy to be alive at all, sending out whispers to passersby containing wondrous words of wisdom about impermanence.


Poem of Mire
By Elissa Rosenthal

Take care of those you wish to keep and hold,
For the future can be not warm but cold.

Let your eyes gaze up towards the warm sun rays,
Maybe your eyes will burn while laughter plays.

Look back down upon my barren dry roots,
If you do water them there will be fruit.

Take care of those you wish to keep and hold,
For the future can be not warm but cold.


👉FOLLOW ME ON TWITTER @TheElissaPost: HERE

👉LIKE MY FACEBOOK FAN PAGE: HERE

👉FOLLOW ME ON INSTAGRAM: HERE

👉FOLLOW BY EMAIL BY PUTTING YOUR EMAIL INTO THE FOLLOW BY EMAIL 

Saturday, May 6, 2017

Creating Sketches From Dreams

By Elissa Rosenthal

Hello, Everyone! This week was interesting, yet not as productive as I wished it to be. As far, as art goes, the only things I have created this week have been the image you can view on my Twitter @TheElissaPost , and Instagram: theelissapost ,as well as the one below.


Maybe it is because I have been trying to work on a book I have been wanting to write for quite a while, or because I did not have much inspiration until last night.

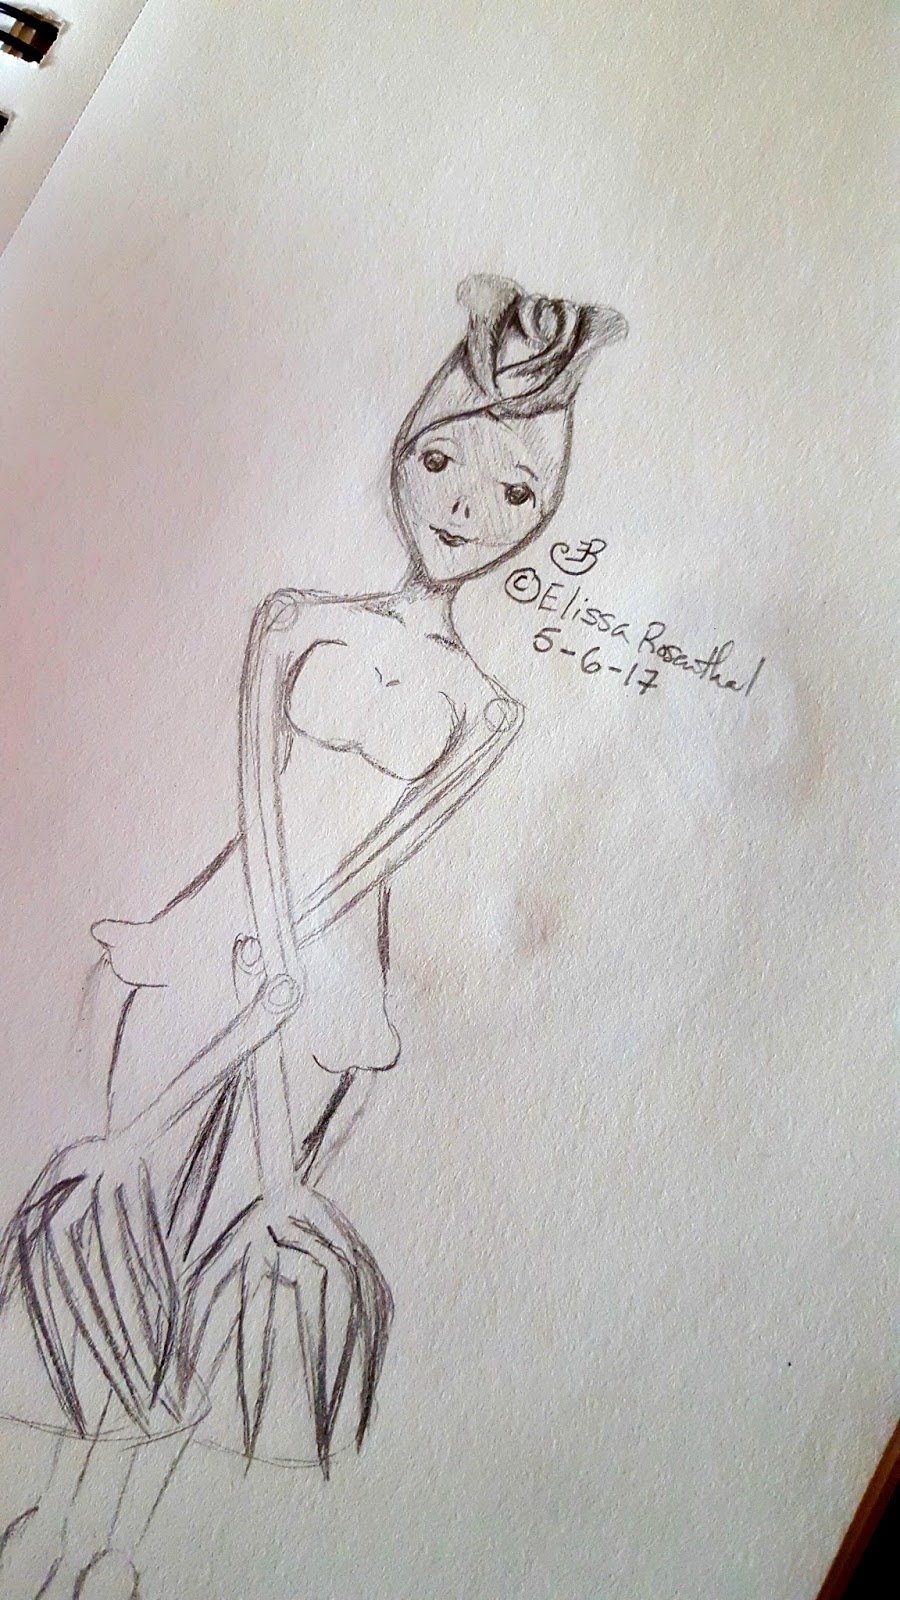
What most of you do not know, is when I have dreams they are, more often than not, realistically vivid and strange, even in the realm of dreams. The sketch above is of one of the characters that was in my dream. She was all a periwinkle blue, with a flower bud as the top of her head, going down to a razor sharp jawline. Her face looked beautiful and withheld danger in her onyx eyes. She whispered in my ear that I have forgotten about her, and then, she nearly slashed at my face with her long blade-like figures. Only because she wanted me to remember her, not for her harming me, but for her dangerous beauty.

It was quite an interesting dream filled with other characters, just as vivid as the periwinkle fairy. I may draw more of them, if my mind allows me to remember those parts of the dream.

Have you ever used dreams for inspiration?

👉FOLLOW ME ON TWITTER @TheElissaPost: HERE

👉LIKE MY FACEBOOK FAN PAGE: HERE

👉FOLLOW ME ON INSTAGRAM: HERE


👉FOLLOW BY EMAIL BY PUTTING YOUR EMAIL INTO THE FOLLOW BY EMAIL PLUGIN.

Saturday, April 29, 2017

Looking At Progress

By Elissa Rosenthal

Hello, Everyone! For this week in my artistic journey I decided to redo one of my old sketches, as well as brush up a bit on drawing hands.


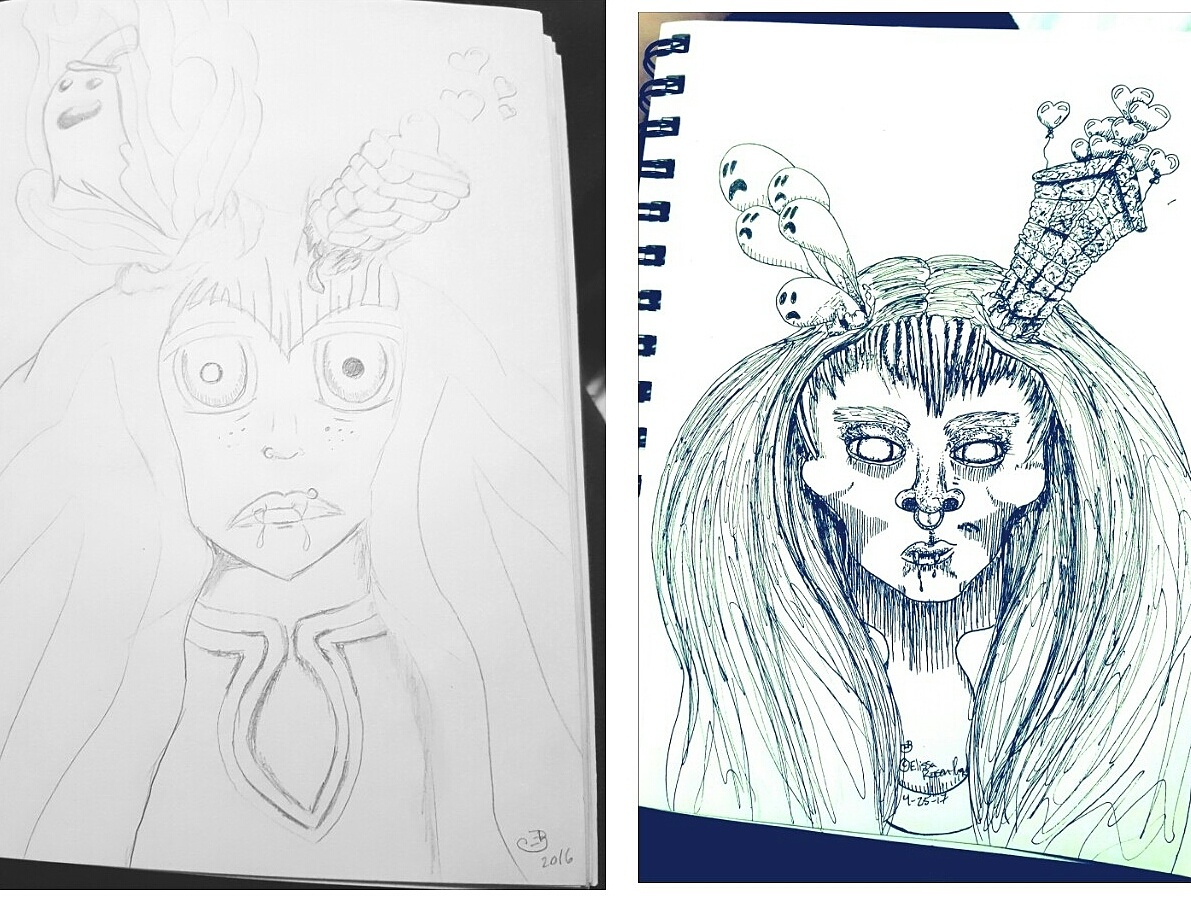
The image on the left is one I did in 2016. I remember not being satisfied with the way it turned out, because I wanted it to be a bit more on the creepy side and not just weird. At the time I did not know much of anything about perspective, so there is not even a sense of trying to get the angle of the brickwork correct. Plus, to me the "ghost" on this one looks a little too friendly.

The image on the right is the redone version of the other image and I personally enjoy it a lot more. It has the creepiness I originally wanted in the previous sketch, and the brickwork looks a lot better.

Where I took inspiration for this idea was by looking on YouTube. I was seeing a lot of people redoing their old artwork and I thought it was a really good idea! When you are focused on how you are drawing now, it is sometimes really hard to see any improvement, but with this exercise your improvement is easier to see.

I as well worked a little on drawing hands. Hands, at least to me, are one of the hardest things to draw. Hands and feet. It must have to be because of all the little parts that are effected by the other little parts, and how they brush, push and pull against each other in so little amount of space. At least, this is my theory.


The way I draw hands has some set backs, as I have been seeing recently. I have a tendency of drawing hands by doing the finger I see the most of first and then the rest of the hand. I am starting to think, maybe I should try boxing the outer shape of the hand first, and then worry about the details. This would maybe fix the problem of sometimes the hand being bigger than I expected, like with the fist on the bottom left. With this hand I thought I would have room, and then I did not have enough room for the thumb.

I hope that you enjoy my art and these postings!

If you wish to follow me on social media:

👉FOLLOW ME ON TWITTER @TheElissaPost: HERE

👉LIKE MY FACEBOOK FAN PAGE: HERE

👉FOLLOW ME ON INSTAGRAM: HERE

👉FOLLOW BY EMAIL BY PUTTING YOUR EMAIL INTO THE FOLLOW BY EMAIL PLUGIN.

Saturday, April 22, 2017

Mandalas and Watercolor

By Elissa Rosenthal

Hello, Everyone! For this week in my artistic journey I went back to two types of art: pen and pen with watercolor. In the past I have dabbled with these supplies, but I did not stick with them nearly long enough to make great progress. I find great enjoyment in using these supplies, so it surprised me how long I have stayed away from them.

If you have been following me on Instagram, you have seen this image before. It is currently my highest liked image on Instagram with sixty-six likes.


I have found out from this, that there are quite a few people on Instagram who are fans of mandalas, like myself. Plus, there are some people on there who are excellent at creating mandalas. One of these people goes under the name "tak_mist". I follow them, and they make spectacular mandalas! tak_mist has inspired me to work more on my detailing and proportions with my mandalas.

As far as pen with watercolor, this is the watercolor painting I shared on Instagram of a cherry blossom tree. The original photo I took, which I used as reference, was a white cherry blossom tree, but I wanted to use the color pink in this particular painting. I wanted to have this one be a little more impressionistic, which I hope came across.


The previous image however, was not my first time going back to watercolor. I had done one painting before that one which is right here.


I know in this post I have mentioned Instagram quite a lot, but I do want you, my readers to get something out of these postings. So, even if I do post some stuff on Instagram that I do not mention here, it will go the same way for those on Instagram. This way there is a reason for you, my readers, to keep returning to these postings.

As far as my experience with watercolor, I quite enjoyed the experience and I want to work more with the medium. With watercolor it dries a lot quicker than other painting mediums and you can layer over old paint with little issue, as long as you let the previous layer dry completely. This is what I did as the last step for the watercolor painting of the girl shown above. After painting all of the background and detailing I let the whole piece dry completely and went over the whole thing with a light blue wash. My decision to do so was based on me wanting to convey as clearly as possible that she was underwater.

I hope that you enjoy my art and these postings!

If you wish to follow me on social media:

👉FOLLOW ME ON TWITTER @TheElissaPost: HERE

👉LIKE MY FACEBOOK FAN PAGE: HERE

👉FOLLOW ME ON INSTAGRAM: HERE

👉FOLLOW BY EMAIL BY PUTTING YOUR EMAIL INTO THE FOLLOW BY EMAIL PLUGIN.


Saturday, April 15, 2017

Fun With Acrylics: Needed Some Rainbows

By Elissa Rosenthal

Hello Everyone! Thank you for coming to read my blog, I really appreciate it! If you enjoy what I post and/ or want to follow up on what I do outside of this blog, my social media links can be found at the end of this post.

Little life update and PSA is in the next paragraph. If you wish to skip, please go to the paragraph after the next, thank you.

This week in my artistic journey I have been having a bit of motivational issues, which is why this post is coming out so late in the day, and for that I am deeply sorry. It has not so much been not wanting to create, as the fear to create. I have generalized anxiety, and I did one thing which put me on edge, I read an article about how this one gal had her artwork copied by a copy-cat "artist" in Mexico. Link to article HERE .This, plus reading all the comments about how other artists have had similar issues started to bring up my anxiety a bit. Though now I have started to calm down, possibly due to the act of creating, as well as the knowledge that I should not let my fear control me. I know I could legally copy-right everything I have ever created, but as a college student I do not have the funds to do that, nor do I believe my stuff is currently good enough to steal. I may in the future, but not right now. However, this does not mean I would take theft lightly. As a way of calming down my anxiety I have decided to let all of you, my readers, know that everything I post on here, as far as art, is my original artwork. As for the posts I did before I started to share my art, I gave proper credit, as far as I understand, to all creators. I encourage you all to do the same. If you share a piece of art you enjoy, give the artist credit, maybe even give a link to where you found the image. As for my artwork, you may share it if you wish as long as you give proper credit to me. I do not give anyone permission, however, to make money off of my artwork. I ask you all to please be courteous of my rights as the original artwork creator, and thank you for reading my little life update.

This is the artwork I decided to create today as my anxiety was acting up a bit. So please, excuse me for it not being the best. In hindsight I probably should have made the sky a bit lighter. I may try in the future to correct that error, as I have no more time to do that today as the day is coming to a close and I need to post before the day is up.


The time was not wasted though, I found out some little tricks when it comes to acrylic paints. One is to do the farthest back layer first. In this artwork that was the sky. You do this first, because one of the few luxuries of acrylic paint is it will dry quite quickly, meaning you can paint over the layer you put down previously. This brings me to the second trick I found out, which is layering. Each part of this painting I went over at least three times, to make sure it was opaque, since this was the look I was going for. If you are finding your paint is looking more transparent than you want it to be, try letting it dry a little and put another layer of the same paint on top of the previous layer. This trick on its own is the main reason why this painting has so far taken me a little over seven hours to plan and paint.

I hope all of you are doing well today! Creating is a great way to settle the nerves!


👉FOLLOW ME ON TWITTER @TheElissaPost: HERE

👉LIKE MY FACEBOOK FAN PAGE: HERE

👉FOLLOW ME ON INSTAGRAM: HERE

👉FOLLOW BY EMAIL BY PUTTING YOUR EMAIL INTO THE FOLLOW BY EMAIL PLUGIN.

Saturday, April 8, 2017

Oil Paint Drying and Trying Acrylics Again

By Elissa Rosenthal

Hello Everyone! Welcome to my blog! If you enjoy my work and want to keep being updated on what is going on with this blog, as well as other creative ventures of mine, the links to my social media are below this post.

For this week in my artistic journey, I decided to let my oil painting dry a bit more, since some parts I need to fix are still quite wet. Most of the painting is becoming dry however, so I should be able to work on it by next week. To help quicken the drying time I have put the painting in a spare room where I have placed a temperature controlled heater to warm the room up and create some air flow.

As for works I have done this week, I decided to try painting with acrylics again for the fun of it. For this painting I could say it is supposed to have some sort of deeper meaning behind it, how it captures how liberal youth feel tided down, or something of the like. But in truth, this painting was just a bit of fun for me. Put a few abstract heads here, a few lines there, and done.


I enjoy creating art for fun sometimes, not knowing where the painting or drawing is going to go. Every piece of art you create does not have to have some kind of deeper meaning to it. I mean, if someone else puts meaning to this painting, and for some reason they are moved by that meaning, then great! But as a creator of art, I have no obligation to anyone to need a deeper meaning for each creation.

Thank you for reading my blog! Have any questions or comments please leave them in the comment section down below! Let us have a conversation!

👉FOLLOW ME ON TWITTER @TheElissaPost: HERE

👉LIKE MY FACEBOOK FAN PAGE: HERE

👉FOLLOW ME ON INSTAGRAM: HERE

👉FOLLOW BY EMAIL BY PUTTING YOUR EMAIL INTO THE FOLLOW BY EMAIL PLUGIN.

Saturday, March 25, 2017

Chipped Painting and Dragon Wood Burning

By Elissa Rosenthal

Hello Everyone! Thank you for coming to read my blog! I do appreciate it! If you enjoy my writing and want to know more about what I am doing, including staying up to date on this blog, my social media links will be down below.

For this week in my art journey, something unfortunate happened. If you have been reading this blog you know I have been waiting for the first stage of my oil painting to dry. Well, it did finally get dry, however, one of the people I live with ended up "bumping" into it. So now all the paint layers are breaking off in chips and the whole painting is now done for. This as well happened to be the day I finally received my walnut oil.


The image on the left is from the center of the painting, the one on the right is from the side.

Now, not to be too discouraged because of this mishap, I decided to try out some wood burning. I have had this wood burning kit around for the past few years, and have done nothing with it until now, so I figured I would give it a go. I did one wood burning quite a few years ago and it did not turn out too bad, which is why I originally bought the kit. 

This kit however, I would not ,so far, recommend. It is a good wood burner for the amount of money I paid for it, but it is by no means the best. The temperature has some consistency problems, the cord is short enough between the wood burner handle and the dial for the temperature to where it is easily turned by accident, and the tip kept on trying to unscrew it'self from the handle, making it where I had to get pliers to re-screw the hot tip several times.

Mind you I do not have much experience with wood burning, so these may be normal issues, but I do remember the last wood burner I used at my High School being a lot easier to use. Though, that wood burner was a much higher quality one, and obviously more expensive. 


This wood burning took me around seven hours to complete. The wood burner I used is called the Creative Versa-Tool by Walnut Hollow. Though, remember I did get this wood burner quite a few years ago. So for all I know the issues I am facing have to do with the age of the device or it not being used for years. 

To create the head and body I used several circles of differing sizes, a picture of which is available on my new Instagram account, under the name theelissapost . I originally thought of having the dragon reading, but the size between the book and the flowers seemed too off for me. So, instead I decided on a dandelion seed. The scales I did with the side of the wood burning tip. During the whole wood burning I used the standard tip in the wood burning kit.  

While wood burning I recommend having a fan going, and taking breaks. As of right now my throat is scratchy and my allergies have been acting up from the smoke created from wood burning for hours yesterday. Take care of your body while creating art. I will only do wood burning now with a fan and for stretches no longer than, perhaps, two hours.  

👉FOLLOW ME ON TWITTER @TheElissaPost: HERE

👉LIKE MY FACEBOOK FAN PAGE: HERE

👉FOLLOW ME ON INSTAGRAM: HERE

👉FOLLOW BY EMAIL BY PUTTING YOUR EMAIL INTO THE FOLLOW BY EMAIL PLUGIN.

Saturday, March 18, 2017

Drying Oil and Finishing Knitting

By Elissa Rosenthal

Hello Everyone! Welcome to my blog! If you're new and enjoy my content, feel free to follow me on my social media. Instructions and links for my social media are at the end of this post.

For this week I checked up on my oil painting, and it is still drying. The good news however, is the white paint is drying in patches so hopefully by next week it will be dry.

Along with checking up on my unfinished oil painting, I decided to finish my knitting I have been working on for a few months. It was originally going to be a winter holiday present for my grandmother, until I realized how long the whole process was going to take. Now, I will be giving it to her sometime this weekend.


This is the first shawl I have knitted. It is made with twenty-one squares arranged as a three by seven. Now, I am not the best at knitting but, if you want to see more of my knitting projects please comment below.

Thank you for reading my blog I really do appreciate it! Please look at my other articles on this blog, share this blog, and if you want to know more about what I am doing follow me on my social media.

👉FOLLOW ME ON TWITTER @TheElissaPost: HERE

👉LIKE MY FACEBOOK FAN PAGE: HERE


👉FOLLOW BY EMAIL BY PUTTING YOUR EMAIL INTO THE FOLLOW BY EMAIL PLUGIN.

Saturday, March 11, 2017

The Good The Bad and The Oily

By Elissa Rosenthal

Hi Everyone! My name is Elissa, and welcome to my blog! If you're new, you can find the instructions to follow me on here and on my social media at the bottom of this post.

Now, this week in my art journey has had some highs and lows. Let's start with the lows first, and then we can end on a high note.

If you read my last blog post HERE , you'll know I started to work on an old painting of mine. Well, since then I've found out olive oil is NOT the best natural medium to use for oil painting. Currently, some of my painting is dry, however, the white is still as wet as it was the first day I painted it. So, I did a little research in artist forums and found out that olive oil is not considered a drying oil. This probably would have been good to know before painting with it, but we all make mistakes. So, I'm going to let it try to dry for the next few weeks and hopefully the parts with olive oil do eventually dry. If not, I may have to find a way to salvage some of my work on the canvas.

As it so turns out walnut oil is a better alternative, or so say the forums. So, I'm going to be saving up for some, so I can use that instead for the rest of my painting.

Onto the better news! I found out this one really cool guys' YouTube channel. He's an artist, and if people send him art supplies sometimes he makes a video of him using them. You can find his YouTube channel HERE under the username Peter Draws.

I was really inspired by his art videos and his style of drawing. So, I tried my hand at doing a doodle drawing in a more abstract style. It was really fun to do, though time consuming. You really don't understand how long detailed abstract drawings can take until you try to do them yourself.


This doodle took around four hours and was done using Faber-Castell pens. I was using the sizes SB and M. 

Thank you for reading my blog! I really do appreciate it!

Do you enjoy what I do? Do you want to keep up with other stuff I'm doing?

👉FOLLOW ME ON TWITTER @TheElissaPost: HERE

👉LIKE MY FACEBOOK FAN PAGE: HERE

👉FOLLOW BY EMAIL BY PUTTING YOUR EMAIL INTO THE FOLLOW BY EMAIL PLUGIN.

Saturday, March 4, 2017

Laying Down Paint : Unfinished Projects

By Elissa Rosenthal

 Hello, everyone! This week I've been working on that unfinished painting I showed you from last week. It is oil paint, though, so in order for me to get the look and kind of detail I want, I will have to wait a while to do the part of Aphrodite, and even longer to do more detailing.

I realized when I was mixing some of my paints, that I stated something incorrectly last week about what type of paint I used as the original background. This, on its own, made me realize more on why I stopped the painting on this canvas back then. I now remember that I was trying out, for giggles, to mix acrylic and oil paint. There is probably some way to properly do this, however, given my lack of experience doing so, it ended up just making it where there was a lot of paint put on the canvas unnecessarily.

Now, this doesn't mean I didn't use quite a bit of paint in my first attempt to salvage this canvas, I did, though I doubt as much as the first time. Luckily, though, I believe I've been able to keep the paint I used for my depiction of Venus in case it needs more detailing. The paint I used for the dolphins, however, ended up becoming more and more muddy, so I had no other choice than to throw it out.

Pallet for Venus
Pallet for dolphins

During the whole painting process, particularly for this part, I mostly focused on larger shapes and values and blocking them in. This is my first time trying to finish an oil painting so I'm quite happy with how it's turning out so far. Not to say I can't do better in the future, I'm sure with practice I can, but it is a good start. One of my main fears right now is not allowing enough time for the paint to dry completely, so, if it doesn't seem completely dry by next weekend I will be doing something else for that posting. For my medium, I just decided to use olive oil. I know it's not a traditional thing to do, to use regular oil as your medium versus using a labeled medium from the store. I've used traditional medium from the store before, however, my current space does not have enough ventilation for it, I have roommates who don't enjoy the smell, and so far using oil seems to work. I will state, though, using olive oil seems to work a lot better than using sesame seed oil, less smell too.


Do you enjoy what I do? Do you want to keep up with other stuff I'm doing?

👉FOLLOW ME ON TWITTER @TheElissaPost: HERE

👉LIKE MY FACEBOOK FAN PAGE: HERE

👉FOLLOW BY EMAIL BY PUTTING YOUR EMAIL INTO THE FOLLOW BY EMAIL PLUGIN.


Saturday, February 25, 2017

Working On Unfinished Projects

By Elissa Rosenthal

Hello everyone! I hope you are having a good day today!

For this week in my journey of getting back on the artistic horse, I decided to work on a project of mine that I had put to the side for quite a while. It is a depiction of the goddess Aphrodite in oil paint.

At first I wanted to exaggerate the proportions of the head and eyes, and ended up deciding against it as I did some practice sketches. To me it did not seem to align with the goddesses image, so I decided to go a little more on the traditional proportion route. Though I may do a little bit of exaggerating with some features later on.

This is one of my first sketches for the face I was planning on using for the depiction of Aphrodite. 

In my original planning stages for the piece I wanted to have the depiction of Aphrodite crossing her legs, however, due to my gained knowledge on goddess since then, I've decided to have her be a mermaid. Plus, with painting in layers I can always start over or go over particular parts that aren't  pleasing to the eye.

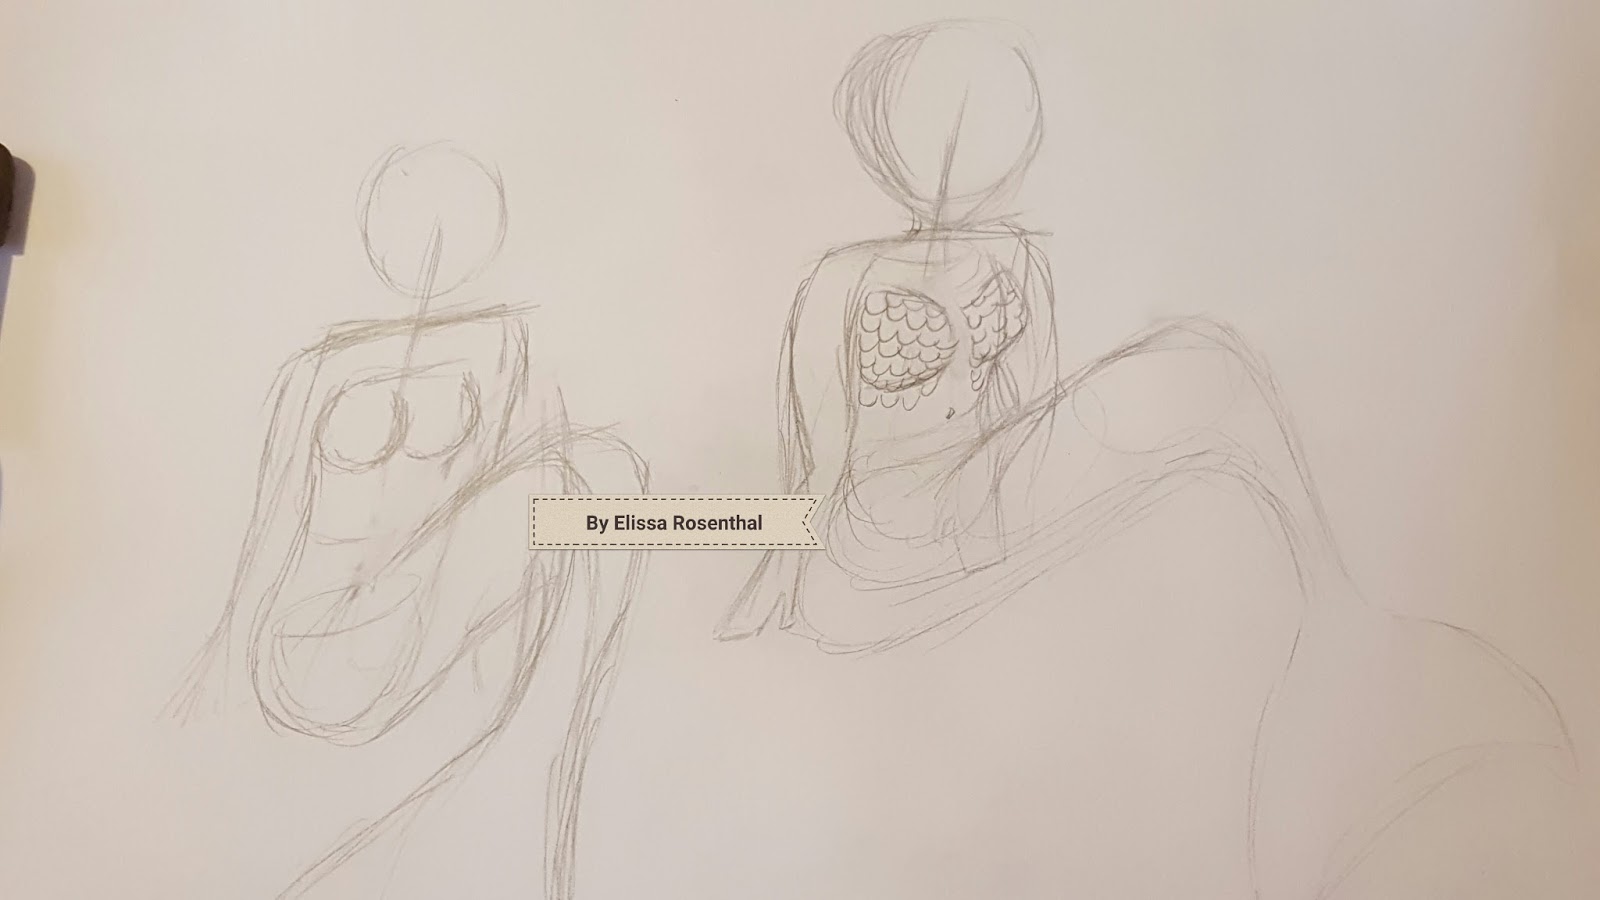
The photo above are sketches of mine to try to see how I want the mermaid to be posed. 

From my own experience with painting, the main thing is to make sure the canvas will not be showing through, so at this particular stage I'm not too concerned with how the background looks. It was set up for the previously decided pose for the goddess which is why it is a bit off on placement. I'm thinking of maybe doing some geometric patterns or sea life around the edges to help with the balance of the painting. This is so the tail doesn't lead your eyes off the canvas.

Here, I've started to sketch the figure on the painting itself with a charcoal pencil.

In case you wish to know, the medium I used for the paint was just simple sesame oil. The original reason why I set this painting aside was because I needed the oil to have plenty of time to dry. Then it ended up being where I knew I needed to study more to feel comfortable doing the painting at all. I hope that I can do well with this painting in the coming weeks. 

For next week I will be showing my continued progress with this painting. Hopefully it goes well! And if not, well, there is always another canvas needing paint. 

Thank you so much for reading my blog, I really do appreciate it!

Want to keep up-to-date on my blog and other things I'm up to?

👉FOLLOW ME ON TWITTER @TheElissaPost: HERE

👉LIKE MY FACEBOOK FAN PAGE:HERE

👉FOLLOW BY EMAIL BY PUTTING YOUR EMAIL INTO THE FOLLOW BY EMAIL PLUGIN.

Saturday, February 18, 2017

The Art of Eyes : Distortion and Shading Practice

By Elissa Rosenthal

Hi everyone! For this week I decided to keep up with practicing drawing the eye and while doing so I've learned some little tricks for helping to correct some errors. 

1) I found out how you can use photography to your advantage! 

This may not work in all settings since I'm drawing from a photograph, but what I found helps is while I'm drawing to take photos during some pauses in the process to see how I'm doing. This little tip helped me figure out the next one as well.

2)Try to look as straight on to your subject and your paper since, if you don't, it can end up becoming distorted. 

From my own experience this is because your eye is seeing your subject at a different angle, same as your paper. This can make it where you can end up drawing lines too long or too short, among other possible distortion issues.


I found out the distortion that was happening after I took my first photo (shown above). I saw that I had made the end of the eyelid- near the tear duct- too close to the tear duct and at a too drastic of an angle.

Then, once I took my next photo, I found out I had made the pupil a little too small to the right, so I fixed it as best as I could at the time. 
Once I had taken what I considered my last photo of this eye I had been working on, I remembered three more tricks I wanted to share. 

1) Drawing in the same direction the whole time makes the image look more natural and gives it less unnecessary texture. 

2) Blending with a paper napkin works better than blending with a piece of computer paper.

3) You can over blend.


In the picture shown above is my form study I did since I had enough time to do it this week. A way I found to help with not using guide lines in the shadow -since it's so light in value- is to lightly shade in the general area and erase what doesn't need to be there. 

Thank you for reading my blog! I really do appreciate it! If you want to ask me any questions directly related to this post you can comment in the comment section below and I will try my best to answer. 


DO YOU WANT TO KNOW WHAT ELSE I'M DOING AS WELL AS KEEP UP WITH THIS BLOG?

👉FOLLOW ME ON TWITTER @TheElissaPost: HERE

👉LIKE MY FACEBOOK FAN PAGE:HERE

👉FOLLOW BY EMAIL BY PUTTING YOUR EMAIL INTO THE FOLLOW BY EMAIL PLUGIN.

Saturday, February 4, 2017

Staying With Grayscale


By Elissa Rosenthal

Hello my butterflies! I'm sorry about the late upload. I usually schedule my posts to come up automatically in the morning on Saturday. This past week, however, I've been dealing with a cold. So, instead of writing my post last night and scheduling it to come up early today as I usually do, I ended up falling asleep. I am sorry. 

Anyway, here is the post for the week! I've found this one artist who does YouTube videos and, though her work mostly goes around Photoshop, I have been finding some of her videos quite interesting and they have sparked more of a desire in me to draw. Though I will say, the particular video I was watching was a bit out of my current league. Her YouTube channel is called Istebrak, and I was watching her video on how to color skin. 

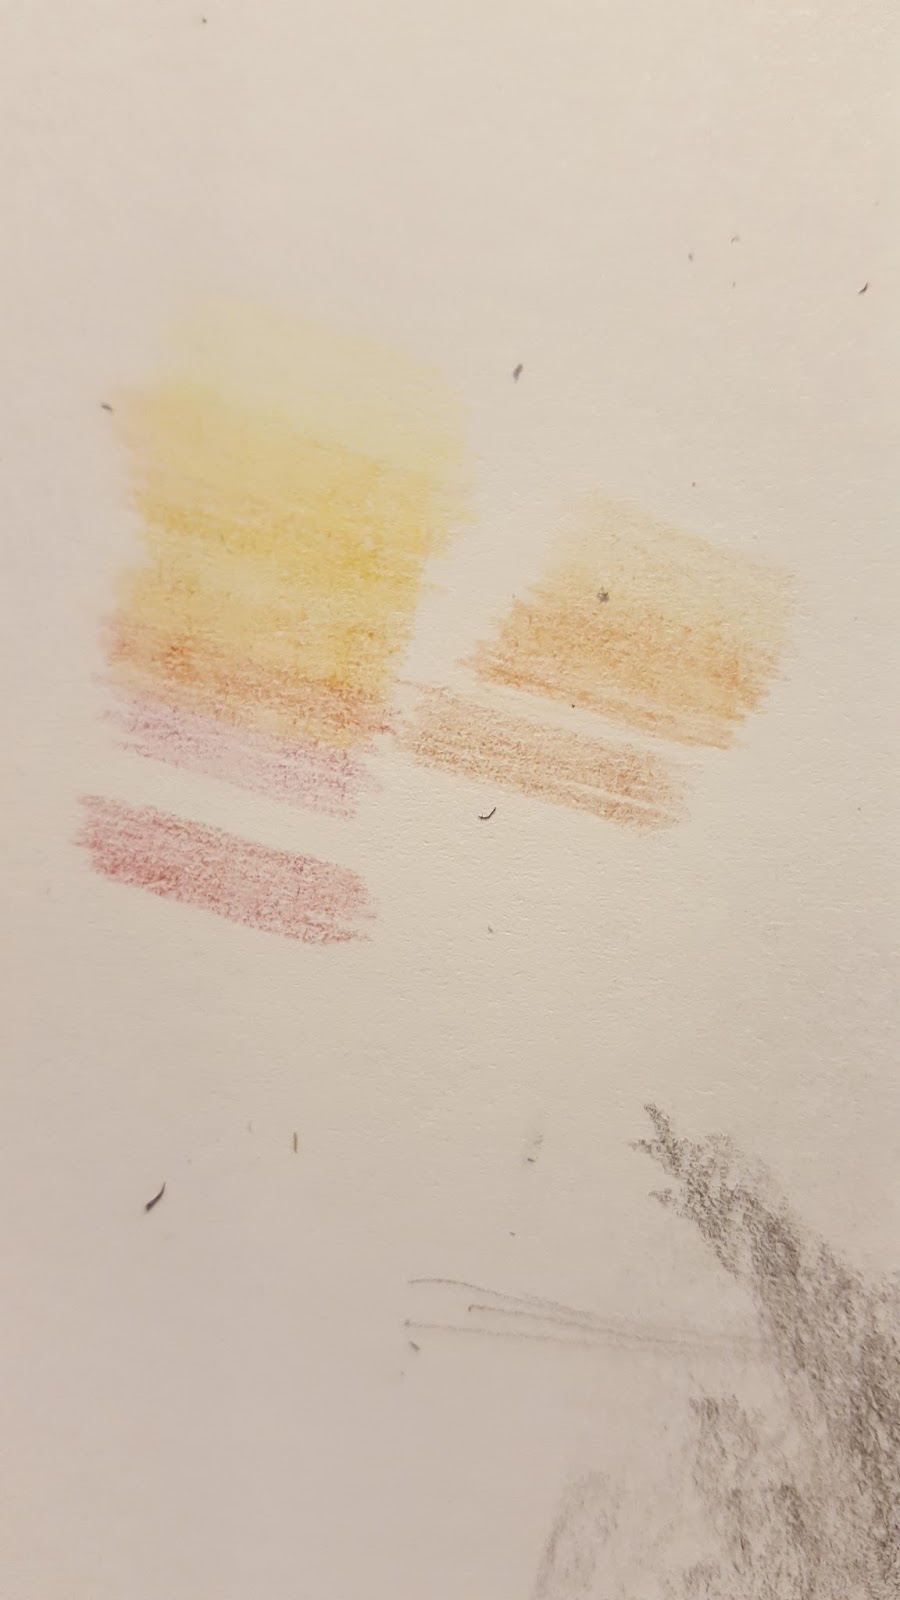
Now, though I had seen a previous video of hers' where there was a warning about going to colors too quickly, I did it anyway. At least until I realized she was right. As you can see below I chose the colors I thought would work for my particular situation with using colored pencils. They are Shuttle Art brand colored pencils if you are wondering. They are from their 136 color set. These are cheaper colored pencils, so I don't particularly recommend them, though they are better than the kind you would use in Elementary School. 

Istebrak was right. Since I had not practiced grayscale for a long time, I had a particularly hard time with colors and distinguishing their value. I tried to take some of the tips from her drawing in Photoshop and translate them into colored pencils. It particularly did not help that I was going off of no references. As you can see the nose has, as Istebrak refers to them, baby nostrils. If this nose was on an adult they would have some serious breathing problems. The second image is supposed to be the skin that would be around the eye, however, it looks a bit too almond shaped. Not to mention both have very yellow skin, to where it looks almost neon. 


So, I went back to grayscale. I took out my favorite pencil, a Faber-Castell 6B, and started drawing a nose. I decided to take the time to go through some images of people's faces for this one though. I first blocked out the nose, finding where the curve where the tear ducts of the eyes would end, then from there finding the placement of the nostrils. What I found interesting, and what helped me to stay away from the problem of baby nostrils, is to divide the opening of the nose into three equal sections. Two for the nostrils, one for the septum. Plus, I tried my best to hold my pencil as far away from the tip as I could in order to start with large shaded areas, first making the whole area of the nose a mid-tone. I used another piece of computer paper to smudge the pencil, since smudging the medium with your figure puts your oils onto the paper, therefore making any mistakes harder to erase. I personally think this one is a lot better than I expected, particularly since this my first grayscale nose I've done in around a year or two. Though I will always want to be better and I am going to try my best to be better. 


DO YOU LIKE WHAT I DO ON MY BLOG?


FOLLOW BY EMAIL BY PUTTING YOUR EMAIL INTO THE FOLLOW BY EMAIL PLUGIN.


FOLLOW ME ON TWITTER @TheElissaPost : HERE

LIKE MY FACEBOOK FAN PAGE : HERE

Thank you for reading my blog! 

Saturday, January 28, 2017

Shading and Gesture

By Elissa Rosenthal

For this week I've mostly focused on my gesture drawings since I know it is one of the most important fundamentals. Plus, they really help you re-learn the proportions of the human body. I put some notes down with my self criticism, because this is my artistic journey, I know I have a long way to go. Then, even when I get to that point, I know I'll want to get even better.


I started off by doing the basic line structure to figure out positions for the body.


Then I looked at some references from searching on Google full body dramatic poses and did some slightly more elaborated gestures based on those references.


Along with the gesture drawings, I practiced some more shading on a basic shape. In this example a tub of lip balm. I'm going to try doing this type of exercise next week with my better quality pencils. I was disappointed with the lack consistency my mechanical pencil led had. Near the end it started to be more consistent because of wearing down the led on one side, however,  it would still make random harder marks on the paper if the mechanical pencil wasn't held just right.


DO YOU LIKE WHAT I DO ON MY BLOG?

FOLLOW BY EMAIL BY PUTTING YOUR EMAIL INTO THE FOLLOW BY EMAIL PLUGIN.

FOLLOW ME ON TWITTER @TheElissaPost : HERE

LIKE MY FACEBOOK FAN PAGE : HERE

Saturday, January 21, 2017

Starting The Creative Process And Anxiety Relief

By Elissa Rosenthal

When I went back to drawing this week, with this being the first time in a long time, I found myself having a hard time trying to find my creativity and inspiration. So, I defaulted to trying out some shading exercises, particularly because I know I will need to practice shading again.

For this week I did it with a basic, number two led, mechanical pencil since I didn't want to break out my nicer pencils until I practice a bit more. The one with the balls on top of each other was obviously more difficult since I needed to remember to have the reflection coming off the bottom ball onto the bottom of the top one. Plus, this is type of practice is always good for practicing highlights and values. 

Now, since today with the inauguration and everything my anxiety started acting up a little so I decided to draw some rainbow mandalas. Drawing mandalas always helps my mind calm down and get more into the creative mind set. However, I kinda got a bit carried away and did quite a few of them. At the very least these can help with bringing back the muscle memory of straight lines and even curves. As you see these mandalas are far from perfect. Though that was not my intent with this particular exercise it does help me notice which types of lines I could need help with. 


If you get anxious like I do I highly recommend trying out drawing mandalas. They do not need to be a particular design and you can look them up online for design inspiration. 

DO YOU LIKE WHAT I DO?

LIKE MY FACEBOOK FAN PAGE : HERE 

FOLLOW ME ON TWITTER @TheElissaPost : HERE

YOU CAN ALSO PUT YOUR EMAIL INTO THE FOLLOW BY EMAIL PLUGIN.

Thank you so much for taking time out of your day for looking at my blog and following me on my social media! Till need time my butterflies!

Saturday, January 14, 2017

Going Artsy With This Blog- This Blog's Future

By Elissa Rosenthal

Hi everyone! I've been thinking for a while on how this blog doesn't have a narrow focus, and has been a melting pot of randomness. This has been the case because, to be honest, with this being my very first blog, I had no idea what I selectively wanted to write about. The major proponent of this decision has been that I've been writing on here on a weekly basis and I wanted to make sure I didn't feel drained by the topic of choice.

However, as I said, I've been thinking and I believe the best decision is for me to try my best sticking to two subjects. The subjects I'll be going for is art and celiac disease. The main topic of this blog will be my artistic journey, and if I do come across something new to share with the celiac community I will do that as well for that week.

It has been a while since I've practiced by art skills, and I do love creating. So, you all will be seeing me pretty much on the level I used to be a very long while back. This is because as with most skills, if you don't practice drawing your ability degrades over time. If I find any good technique's for practicing I will let you know in the article for that week, as well as my experiences with it and any new art medium I've tried.  

I hope to see all your views and comments in the future of this blog! May your day be merry and fulfilling! Till next time my butterflies!

ENJOY MY WRITING?

FOLLOW THIS BLOG BY PUTTING YOUR EMAIL ADDRESS INTO THE FOLLOW PLUGIN!

LIKE MY FACEBOOK FAN PAGE

FOLLOW ME ON TWITTER @TheElissaPost