Showing posts with label artist blog. Show all posts

Saturday, August 12, 2017

Wave Lengths

 Wave Lengths
by Elissa Rosenthal


Radiant wave lengths prevent me from sleep,
Tilling on the edge of reality,
Kept in a box of normality,
Filled with the blues of originality.

See,
I may not wish to wake,
In this wish-washy world,
Forced to make myself look like bird,
Peacocking.

I,
Want to be who I am meant to be,
Whether or not that is,
In this reality.

You,
May never want me to be,
Anything but your perception of me,
Forcefully.

Keep,
Your mind out of my memories,
Those you said know one else would see,
See my ways,
See my work,
Never want to talk to me.

Now,
I know,
You say that to your self.
Your fear of being put on a shelf,
And forgotten.

Seek,
Some help,
Some comfort,
Don't tell me that words don't hurt.

I can learn,
To love myself,
And not have little self deprecating voices,
Depict,
Who I will be.

Sunday, July 30, 2017

Money Maker


Money Maker
By Elissa Rosenthal


Money please,
My dear friend,
I will drain you,
Till the end.

Lick up my lies,
Of solitary waste,
Let you feel alone,
A waste of space.

Pick up my money,
My money maker of wishes,
Hopes to have food,
Hopes to have dishes.

Feel the fear of loss,
Truth has a clear ring,
My money clogs your vision,
To feel its poison sting.

Pick up my money,
Drop all your hope,
Hold my money in your hands,
While you go on and gloat.

Saturday, May 6, 2017

Creating Sketches From Dreams

By Elissa Rosenthal

Hello, Everyone! This week was interesting, yet not as productive as I wished it to be. As far, as art goes, the only things I have created this week have been the image you can view on my Twitter @TheElissaPost , and Instagram: theelissapost ,as well as the one below.


Maybe it is because I have been trying to work on a book I have been wanting to write for quite a while, or because I did not have much inspiration until last night.

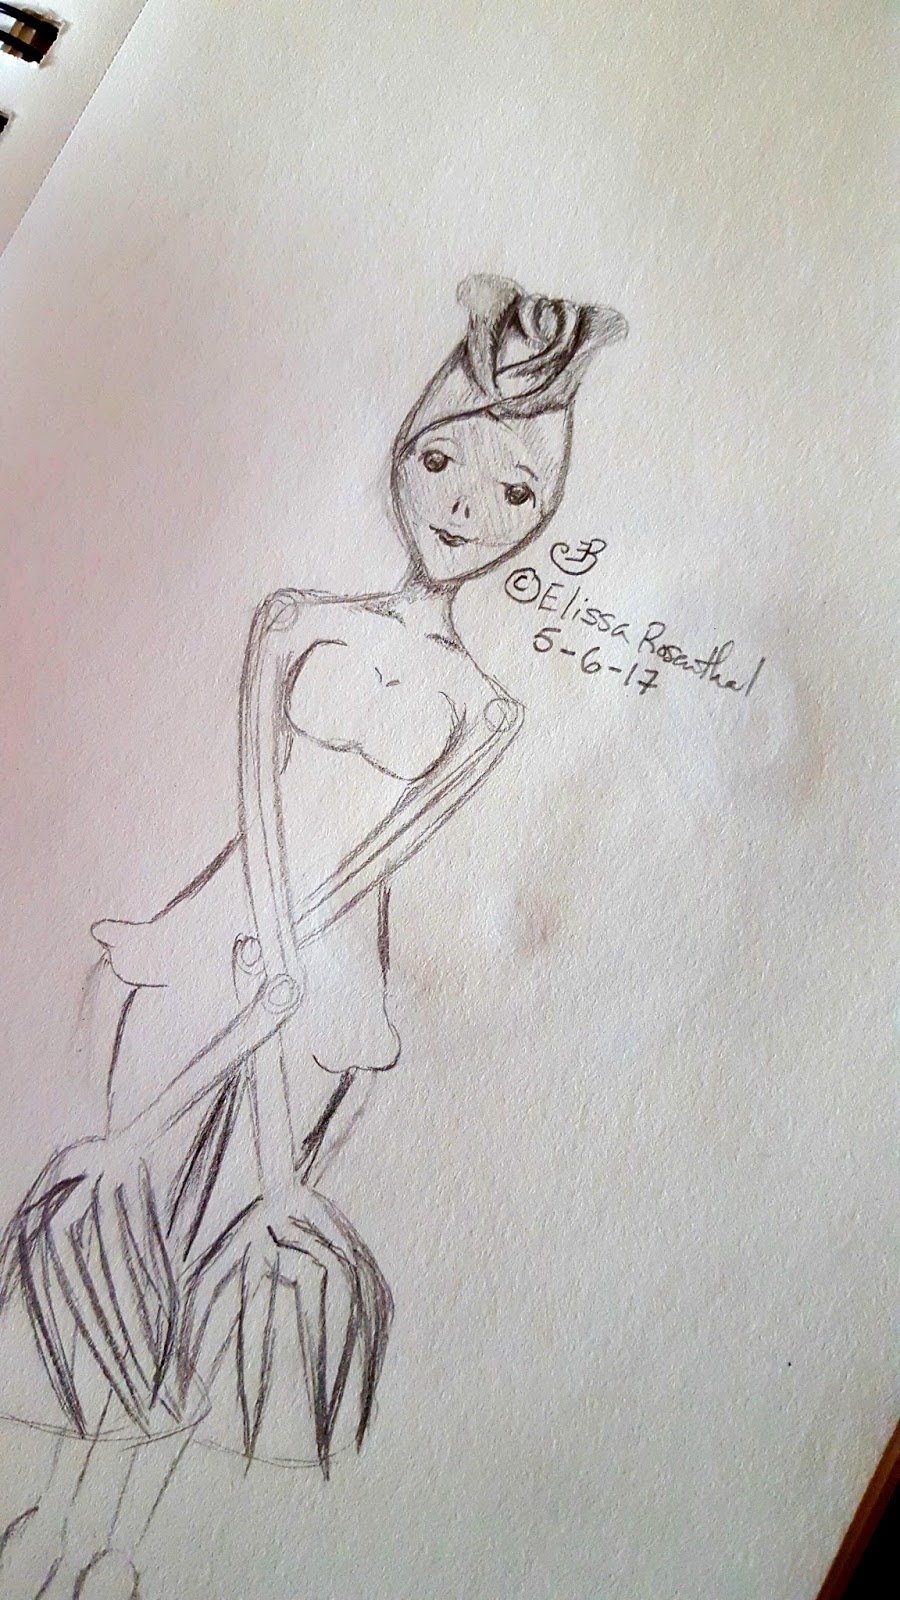
What most of you do not know, is when I have dreams they are, more often than not, realistically vivid and strange, even in the realm of dreams. The sketch above is of one of the characters that was in my dream. She was all a periwinkle blue, with a flower bud as the top of her head, going down to a razor sharp jawline. Her face looked beautiful and withheld danger in her onyx eyes. She whispered in my ear that I have forgotten about her, and then, she nearly slashed at my face with her long blade-like figures. Only because she wanted me to remember her, not for her harming me, but for her dangerous beauty.

It was quite an interesting dream filled with other characters, just as vivid as the periwinkle fairy. I may draw more of them, if my mind allows me to remember those parts of the dream.

Have you ever used dreams for inspiration?

👉FOLLOW ME ON TWITTER @TheElissaPost: HERE

👉LIKE MY FACEBOOK FAN PAGE: HERE

👉FOLLOW ME ON INSTAGRAM: HERE


👉FOLLOW BY EMAIL BY PUTTING YOUR EMAIL INTO THE FOLLOW BY EMAIL PLUGIN.

Saturday, April 29, 2017

Looking At Progress

By Elissa Rosenthal

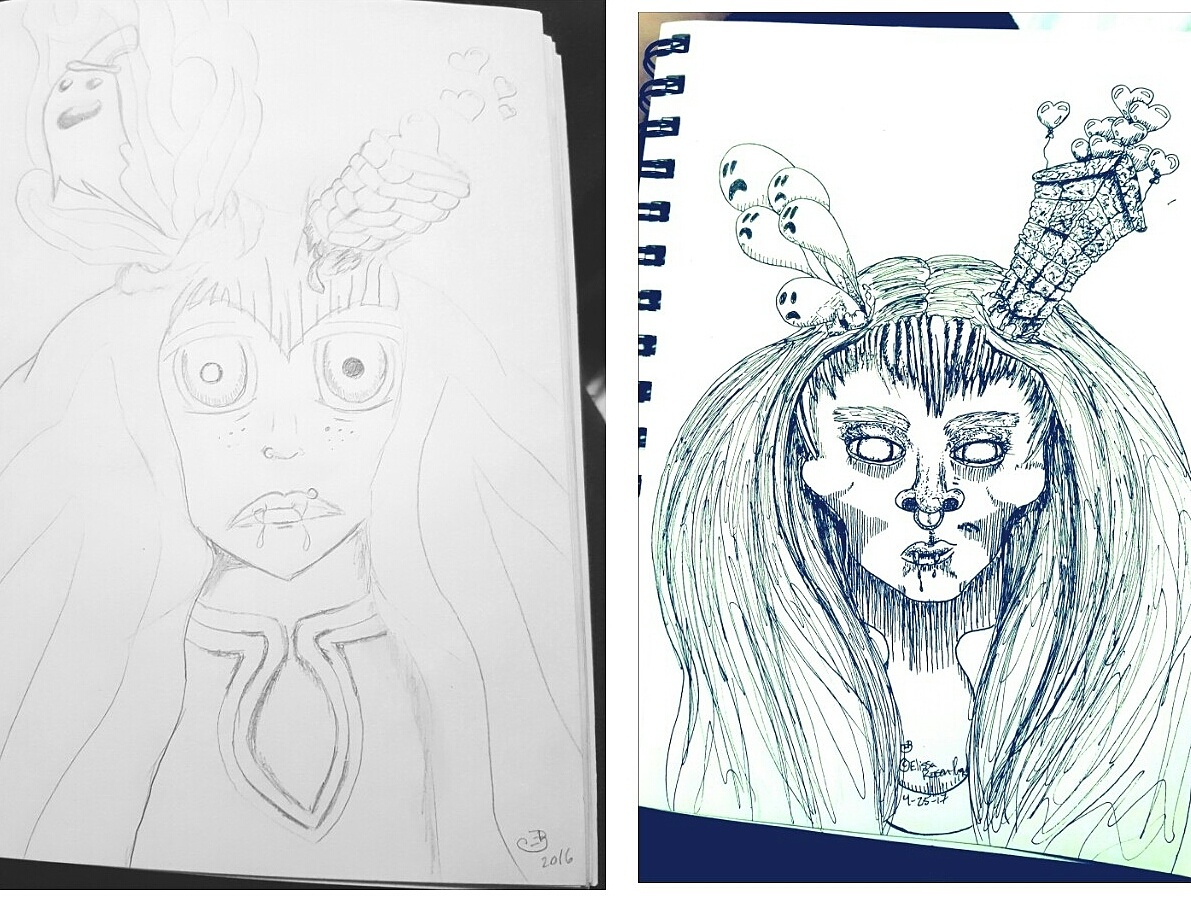
Hello, Everyone! For this week in my artistic journey I decided to redo one of my old sketches, as well as brush up a bit on drawing hands.


The image on the left is one I did in 2016. I remember not being satisfied with the way it turned out, because I wanted it to be a bit more on the creepy side and not just weird. At the time I did not know much of anything about perspective, so there is not even a sense of trying to get the angle of the brickwork correct. Plus, to me the "ghost" on this one looks a little too friendly.

The image on the right is the redone version of the other image and I personally enjoy it a lot more. It has the creepiness I originally wanted in the previous sketch, and the brickwork looks a lot better.

Where I took inspiration for this idea was by looking on YouTube. I was seeing a lot of people redoing their old artwork and I thought it was a really good idea! When you are focused on how you are drawing now, it is sometimes really hard to see any improvement, but with this exercise your improvement is easier to see.

I as well worked a little on drawing hands. Hands, at least to me, are one of the hardest things to draw. Hands and feet. It must have to be because of all the little parts that are effected by the other little parts, and how they brush, push and pull against each other in so little amount of space. At least, this is my theory.


The way I draw hands has some set backs, as I have been seeing recently. I have a tendency of drawing hands by doing the finger I see the most of first and then the rest of the hand. I am starting to think, maybe I should try boxing the outer shape of the hand first, and then worry about the details. This would maybe fix the problem of sometimes the hand being bigger than I expected, like with the fist on the bottom left. With this hand I thought I would have room, and then I did not have enough room for the thumb.

I hope that you enjoy my art and these postings!

If you wish to follow me on social media:

👉FOLLOW ME ON TWITTER @TheElissaPost: HERE

👉LIKE MY FACEBOOK FAN PAGE: HERE

👉FOLLOW ME ON INSTAGRAM: HERE

👉FOLLOW BY EMAIL BY PUTTING YOUR EMAIL INTO THE FOLLOW BY EMAIL PLUGIN.

Saturday, April 22, 2017

Mandalas and Watercolor

By Elissa Rosenthal

Hello, Everyone! For this week in my artistic journey I went back to two types of art: pen and pen with watercolor. In the past I have dabbled with these supplies, but I did not stick with them nearly long enough to make great progress. I find great enjoyment in using these supplies, so it surprised me how long I have stayed away from them.

If you have been following me on Instagram, you have seen this image before. It is currently my highest liked image on Instagram with sixty-six likes.


I have found out from this, that there are quite a few people on Instagram who are fans of mandalas, like myself. Plus, there are some people on there who are excellent at creating mandalas. One of these people goes under the name "tak_mist". I follow them, and they make spectacular mandalas! tak_mist has inspired me to work more on my detailing and proportions with my mandalas.

As far as pen with watercolor, this is the watercolor painting I shared on Instagram of a cherry blossom tree. The original photo I took, which I used as reference, was a white cherry blossom tree, but I wanted to use the color pink in this particular painting. I wanted to have this one be a little more impressionistic, which I hope came across.


The previous image however, was not my first time going back to watercolor. I had done one painting before that one which is right here.


I know in this post I have mentioned Instagram quite a lot, but I do want you, my readers to get something out of these postings. So, even if I do post some stuff on Instagram that I do not mention here, it will go the same way for those on Instagram. This way there is a reason for you, my readers, to keep returning to these postings.

As far as my experience with watercolor, I quite enjoyed the experience and I want to work more with the medium. With watercolor it dries a lot quicker than other painting mediums and you can layer over old paint with little issue, as long as you let the previous layer dry completely. This is what I did as the last step for the watercolor painting of the girl shown above. After painting all of the background and detailing I let the whole piece dry completely and went over the whole thing with a light blue wash. My decision to do so was based on me wanting to convey as clearly as possible that she was underwater.

I hope that you enjoy my art and these postings!

If you wish to follow me on social media:

👉FOLLOW ME ON TWITTER @TheElissaPost: HERE

👉LIKE MY FACEBOOK FAN PAGE: HERE

👉FOLLOW ME ON INSTAGRAM: HERE

👉FOLLOW BY EMAIL BY PUTTING YOUR EMAIL INTO THE FOLLOW BY EMAIL PLUGIN.


Saturday, April 8, 2017

Oil Paint Drying and Trying Acrylics Again

By Elissa Rosenthal

Hello Everyone! Welcome to my blog! If you enjoy my work and want to keep being updated on what is going on with this blog, as well as other creative ventures of mine, the links to my social media are below this post.

For this week in my artistic journey, I decided to let my oil painting dry a bit more, since some parts I need to fix are still quite wet. Most of the painting is becoming dry however, so I should be able to work on it by next week. To help quicken the drying time I have put the painting in a spare room where I have placed a temperature controlled heater to warm the room up and create some air flow.

As for works I have done this week, I decided to try painting with acrylics again for the fun of it. For this painting I could say it is supposed to have some sort of deeper meaning behind it, how it captures how liberal youth feel tided down, or something of the like. But in truth, this painting was just a bit of fun for me. Put a few abstract heads here, a few lines there, and done.


I enjoy creating art for fun sometimes, not knowing where the painting or drawing is going to go. Every piece of art you create does not have to have some kind of deeper meaning to it. I mean, if someone else puts meaning to this painting, and for some reason they are moved by that meaning, then great! But as a creator of art, I have no obligation to anyone to need a deeper meaning for each creation.

Thank you for reading my blog! Have any questions or comments please leave them in the comment section down below! Let us have a conversation!

👉FOLLOW ME ON TWITTER @TheElissaPost: HERE

👉LIKE MY FACEBOOK FAN PAGE: HERE

👉FOLLOW ME ON INSTAGRAM: HERE

👉FOLLOW BY EMAIL BY PUTTING YOUR EMAIL INTO THE FOLLOW BY EMAIL PLUGIN.

Saturday, March 18, 2017

Drying Oil and Finishing Knitting

By Elissa Rosenthal

Hello Everyone! Welcome to my blog! If you're new and enjoy my content, feel free to follow me on my social media. Instructions and links for my social media are at the end of this post.

For this week I checked up on my oil painting, and it is still drying. The good news however, is the white paint is drying in patches so hopefully by next week it will be dry.

Along with checking up on my unfinished oil painting, I decided to finish my knitting I have been working on for a few months. It was originally going to be a winter holiday present for my grandmother, until I realized how long the whole process was going to take. Now, I will be giving it to her sometime this weekend.


This is the first shawl I have knitted. It is made with twenty-one squares arranged as a three by seven. Now, I am not the best at knitting but, if you want to see more of my knitting projects please comment below.

Thank you for reading my blog I really do appreciate it! Please look at my other articles on this blog, share this blog, and if you want to know more about what I am doing follow me on my social media.

👉FOLLOW ME ON TWITTER @TheElissaPost: HERE

👉LIKE MY FACEBOOK FAN PAGE: HERE


👉FOLLOW BY EMAIL BY PUTTING YOUR EMAIL INTO THE FOLLOW BY EMAIL PLUGIN.

Saturday, February 25, 2017

Working On Unfinished Projects

By Elissa Rosenthal

Hello everyone! I hope you are having a good day today!

For this week in my journey of getting back on the artistic horse, I decided to work on a project of mine that I had put to the side for quite a while. It is a depiction of the goddess Aphrodite in oil paint.

At first I wanted to exaggerate the proportions of the head and eyes, and ended up deciding against it as I did some practice sketches. To me it did not seem to align with the goddesses image, so I decided to go a little more on the traditional proportion route. Though I may do a little bit of exaggerating with some features later on.

This is one of my first sketches for the face I was planning on using for the depiction of Aphrodite. 

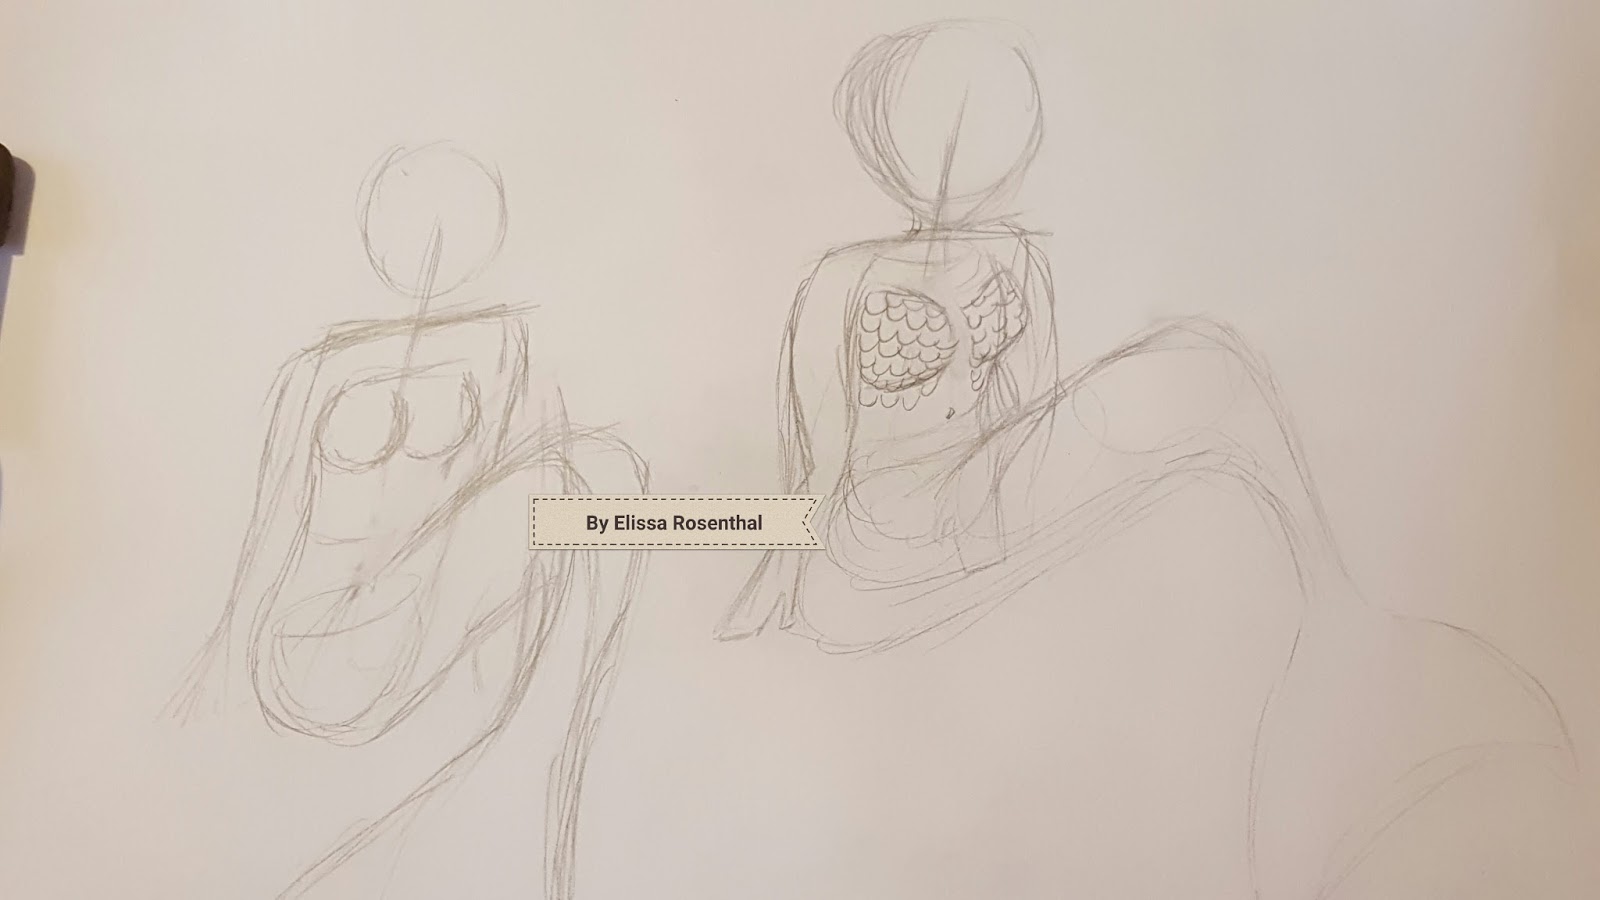
In my original planning stages for the piece I wanted to have the depiction of Aphrodite crossing her legs, however, due to my gained knowledge on goddess since then, I've decided to have her be a mermaid. Plus, with painting in layers I can always start over or go over particular parts that aren't  pleasing to the eye.

The photo above are sketches of mine to try to see how I want the mermaid to be posed. 

From my own experience with painting, the main thing is to make sure the canvas will not be showing through, so at this particular stage I'm not too concerned with how the background looks. It was set up for the previously decided pose for the goddess which is why it is a bit off on placement. I'm thinking of maybe doing some geometric patterns or sea life around the edges to help with the balance of the painting. This is so the tail doesn't lead your eyes off the canvas.

Here, I've started to sketch the figure on the painting itself with a charcoal pencil.

In case you wish to know, the medium I used for the paint was just simple sesame oil. The original reason why I set this painting aside was because I needed the oil to have plenty of time to dry. Then it ended up being where I knew I needed to study more to feel comfortable doing the painting at all. I hope that I can do well with this painting in the coming weeks. 

For next week I will be showing my continued progress with this painting. Hopefully it goes well! And if not, well, there is always another canvas needing paint. 

Thank you so much for reading my blog, I really do appreciate it!

Want to keep up-to-date on my blog and other things I'm up to?

👉FOLLOW ME ON TWITTER @TheElissaPost: HERE

👉LIKE MY FACEBOOK FAN PAGE:HERE

👉FOLLOW BY EMAIL BY PUTTING YOUR EMAIL INTO THE FOLLOW BY EMAIL PLUGIN.

Saturday, February 4, 2017

Staying With Grayscale


By Elissa Rosenthal

Hello my butterflies! I'm sorry about the late upload. I usually schedule my posts to come up automatically in the morning on Saturday. This past week, however, I've been dealing with a cold. So, instead of writing my post last night and scheduling it to come up early today as I usually do, I ended up falling asleep. I am sorry. 

Anyway, here is the post for the week! I've found this one artist who does YouTube videos and, though her work mostly goes around Photoshop, I have been finding some of her videos quite interesting and they have sparked more of a desire in me to draw. Though I will say, the particular video I was watching was a bit out of my current league. Her YouTube channel is called Istebrak, and I was watching her video on how to color skin. 

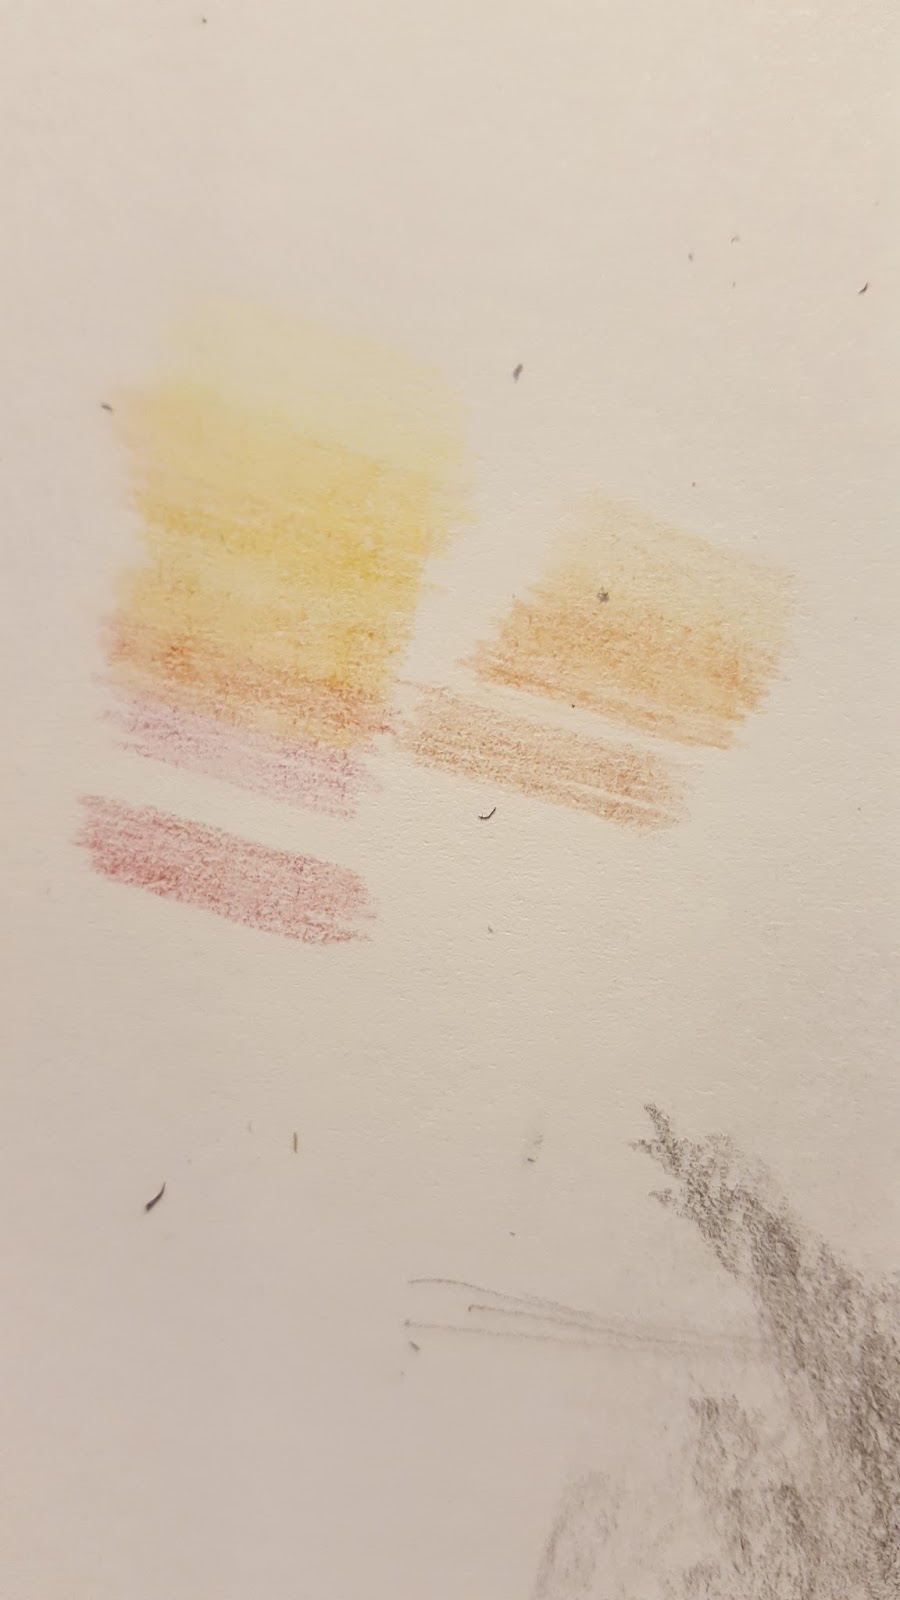
Now, though I had seen a previous video of hers' where there was a warning about going to colors too quickly, I did it anyway. At least until I realized she was right. As you can see below I chose the colors I thought would work for my particular situation with using colored pencils. They are Shuttle Art brand colored pencils if you are wondering. They are from their 136 color set. These are cheaper colored pencils, so I don't particularly recommend them, though they are better than the kind you would use in Elementary School. 

Istebrak was right. Since I had not practiced grayscale for a long time, I had a particularly hard time with colors and distinguishing their value. I tried to take some of the tips from her drawing in Photoshop and translate them into colored pencils. It particularly did not help that I was going off of no references. As you can see the nose has, as Istebrak refers to them, baby nostrils. If this nose was on an adult they would have some serious breathing problems. The second image is supposed to be the skin that would be around the eye, however, it looks a bit too almond shaped. Not to mention both have very yellow skin, to where it looks almost neon. 


So, I went back to grayscale. I took out my favorite pencil, a Faber-Castell 6B, and started drawing a nose. I decided to take the time to go through some images of people's faces for this one though. I first blocked out the nose, finding where the curve where the tear ducts of the eyes would end, then from there finding the placement of the nostrils. What I found interesting, and what helped me to stay away from the problem of baby nostrils, is to divide the opening of the nose into three equal sections. Two for the nostrils, one for the septum. Plus, I tried my best to hold my pencil as far away from the tip as I could in order to start with large shaded areas, first making the whole area of the nose a mid-tone. I used another piece of computer paper to smudge the pencil, since smudging the medium with your figure puts your oils onto the paper, therefore making any mistakes harder to erase. I personally think this one is a lot better than I expected, particularly since this my first grayscale nose I've done in around a year or two. Though I will always want to be better and I am going to try my best to be better. 


DO YOU LIKE WHAT I DO ON MY BLOG?


FOLLOW BY EMAIL BY PUTTING YOUR EMAIL INTO THE FOLLOW BY EMAIL PLUGIN.


FOLLOW ME ON TWITTER @TheElissaPost : HERE

LIKE MY FACEBOOK FAN PAGE : HERE

Thank you for reading my blog! 

Saturday, January 28, 2017

Shading and Gesture

By Elissa Rosenthal

For this week I've mostly focused on my gesture drawings since I know it is one of the most important fundamentals. Plus, they really help you re-learn the proportions of the human body. I put some notes down with my self criticism, because this is my artistic journey, I know I have a long way to go. Then, even when I get to that point, I know I'll want to get even better.


I started off by doing the basic line structure to figure out positions for the body.


Then I looked at some references from searching on Google full body dramatic poses and did some slightly more elaborated gestures based on those references.


Along with the gesture drawings, I practiced some more shading on a basic shape. In this example a tub of lip balm. I'm going to try doing this type of exercise next week with my better quality pencils. I was disappointed with the lack consistency my mechanical pencil led had. Near the end it started to be more consistent because of wearing down the led on one side, however,  it would still make random harder marks on the paper if the mechanical pencil wasn't held just right.


DO YOU LIKE WHAT I DO ON MY BLOG?

FOLLOW BY EMAIL BY PUTTING YOUR EMAIL INTO THE FOLLOW BY EMAIL PLUGIN.

FOLLOW ME ON TWITTER @TheElissaPost : HERE

LIKE MY FACEBOOK FAN PAGE : HERE